The demo from part two can be tested using your web browser, or by scanning this QR Code with your smartphone. All three menu items are now working, including the "Reading Cats Gallery" which was implemented using the Photoswipe library.
In this post we'll be using Cordova to package our project as a native Android app.
Game Plan
Introduction
Installing Cordova
Cordova-izing Our App
Emulating for Android
Adding Native Functionality
Adding a Cordova Plugin
Uploading to the Google Play Store
Things get complicated, so hold on to your cats! I've listed some alternative and potentially simplier approaches in the conclusion.
Introduction - From PhoneGap to Cordova
This post is three years late. My interest in HTML5 native apps is re-kindling. ;)
In earlier posts I mentioned that we'd be using PhoneGap to convert our MeowReader HTML5 app into a native app. Since I wrote those earlier posts PhoneGap was purchased by Adobe, with the core technology becoming the open-source Apache Cordova. Cordova is a framework and API for creating cross-platform native HTML5 apps.
In this post we'll start with the app developed in part 1 & part 2 and we'll compile it into an Android app. Then we'll deploy it to the Google Play store.
The app we've been working on is a combination of HTML, CSS and Javascipt files. Since last time, I've upgraded to a newer version of Photoswipe, but the core functionality is the same. The app pulls images from my Meow Reader Tumblr making them available in a swipeable image gallery.
3) Place our app files (index.html, css folder, js folder) in to the meowreader\www folder. Ensuring that our index.html file includes the following script tag:
The device name can be found once a GenyMotion emulator is running using:
adb devices
Adding Some Native Functionality
Our Meow Reader app doesn't require any native functionality, but imagine we wanted to make use of the device's back button. This is something we normally cannot access from an HTML 5 app. In our Javascript setup code we could add the following:
document.addEventListener("deviceready", onDeviceReady, false);

function onDeviceReady() {
    document.addEventListener("backbutton", backKeyPressed, false);
}

function backKeyPressed() {
   console.log("The back key was pressed!");
}
Adding a Cordova Plugin
Extra native functional can be added to a Cordova app through plugins. If, for example, we want our app to be able to detect a network connect we'd install the Connection Plugin:
Our final task is deployment of our Android application to the Google Play Store.
1) Before you deploy you'll need to produce the Play Store Required Graphic Assets, such as app screenshots, app store icons, promo & banner graphics.
2) Your app will also require launcher icons. These will be used as the app icon once it has been installed on an Andoird device.
I built my icons using the Android Asset Studio Tools, placing the generated mipmap folders into meowreader\platforms\android\res and adjusting the AndroidManifest.xml file:
4) Build the signed application (APK) file from the command line:
cordova build android --release
5) Create a developer account for the Google Play Store and add a new app (with the assets from step 1). Lastly, upload the APK file from step 4 to the APK section of the Play Store app listing.
I've described but one way to build a Cordova application, one that depends heavily on command line tools. If you aren't comfortable at the command line you might want to look into Adobe's PhoneGap Desktop app or their paid PhoneGap build service.
Since deploying the Meow Reader application I developed and deployed a second HTML5 app to the Android store, the Winnipeg New app. If you live in Winnipeg and are interested in learning more about Cordova, check out the Winnipeg Android Meetup on June 23, 2015.
Welcome to part two of our tutorial on building a native mobile app using web technologies. We have been building a simple photo gallery app using images from the Tumblr microblogging service. In part one we built the user-interface framework.
Take a moment to play around with the demo from part one. It can be tested using your web browser, or by scanning this QR Code with your smartphone. Be aware that the top menu item isn't implemted yet. The UI we built uses a single HTML document, CSS, and vanilla Javascript to implement a home page with a menu that allows users to navigate to various sub-sections. Our current app has three items in this menu:
The bottom two menu items were implemented in the previous tutorial. In this post we will be implementing a "touch-swipeable" photo gallery of reading cats. This gallery will be accessible via the first item in our homepage menu.
Game Plan
We're making a basic photo-gallery app. The source of our photos will be my Meow Reader Tumblr. Yes, photos of cats reading and cats learning how to read. Our app isn't going to include the image files, instead it will use Javascript to query the Tumblr API for the URLs and captions of the twenty most recent Meow Reader photos.
In this post we will be developing the following parts of our app:
Downloading photo data using the Tumblr API.
Touch-Swipeable Photo Gallery.
In part three of this tutorial we will use PhoneGap/Cordova to convert our mobile web app into a native app.
Fetching our Images
In order for our app to download images for our photo gallery we need three things:
A source Tumblr. You can use Meow Reader, but feel free to use your favourite Tumblr image blog.
A Tumblr Account. Sign up here. (This does account does not need to be the owner of the Tumblr you plan on using.)
Tumblr provides some great documentation for their API, but I'll give you the compressed version. If you want to fetch the most recent photos associated with a specific Tumblr you need to add this script tag to the bottom of your HTML file:
Mouse-over the above code to see it all. I've formatted the attributes strangely for space considerations.
The portions I've shown in all caps need to be filled in as follows:
TUMBLR: Should be the name of the Tumblr you are using. In my case it's meow-reader.
APIKEY: Should be the OAuth Consumer Key listed on your Tumblr application page. (You did create a Tumblr account and you registered an app, right?)
CALLBACK: By including this parameter the data will be returned to us JSONP-style. In other words, this is the name of the Javascript function that you wish to be called after the data is fetched.
Minus my APIKEY, the script tag I've used in this tutorial is:
The way we've set things up, the Tumblr API will return its data by calling your provided callback function with the requested JSON data as it's argument. Take a moment to look over the Tumblr API JSON structure for photo posts. Here the start of our load_images callback function:
function load_images(json) {
  var i,
      photos,
      photo_big,
      caption_text,
      images = [],
      posts = json['response']['posts'];

  // Gather all 20 images returned from the Tumblr API into an array of hashes.
  for (i = 0; i < posts.length; i++) {
    photos         = posts[i]['photos'][0]['alt_sizes'];
    photo_big      = photos[0]['url'];
    caption_text   = strip(posts[i]['caption']);
    images.push({ url: photo_big, caption: caption_text });
  }
  // Bind these images to our photo gallery here.
}
In this function we loop through all the posts provided in the json['response']['posts'] array, pulling out the URL of the highest-res photo from each post along with the photo caption. We end up with an images array of hashes, where each hash has a url key and a caption key. We're also stripping out all HTML from the photo captions using the following strip function:
// Strip HTML elements from a string.
// IMPORTANT: Only be used with trusted HTML. Very easy to abuse with an XSS attack.
function strip(html) {
  var tmp = document.createElement("div");
  tmp.innerHTML = html;
  return tmp.textContent||tmp.innerText;
}
Now that we have an array of photos to work with, we need to create our mobile-friend image gallery. For this we will be using the Photoswipe library. PhotoSwipe is a free HTML/CSS/JavaScript based image gallery specifically targeting mobile devices. It uses the latest CSS3 transistions and Javascript touch-events to implement a slick touch-swipe photo gallery.
Download the latest Photoswipe zip file. At the time of this blog post, the latest version was 3.0.4. Extract the klass.min.js and code.photoswipe-3.0.4.min.js to your js sub-folder. Extract the error.gif, icons.png, [email protected], loader.gif and photoswipe.css files to your css folder. Import the require Javascript and CSS:
<!-- The css link element should be placed in the head of your index.html file. -->
<link href="css/photoswipe.css" type="text/css" rel="stylesheet" />
<!-- These script elements should be placed at the bottom of your html file before the closing body tag. -->
<script type="text/javascript" src="js/klass.min.js"></script>
<script type="text/javascript" src="js/code.photoswipe-3.0.4.min.js"></script>
By default, Photoswipe expects your HTML to contain a collection of image thumbnails that link to full sized images. However, they're also provide an example of using Photoswipe with an array of hashes that contain image URLs and captions. Since we've already built an array like this, we need only add the following code to the bottom of our load_images function to create our photo gallery:
// Fetch a DOM reference to the first element in our homepage menu.
var launch_link = document.getElementById('launch_link');

// Configure Photoswipe to load images from the array of hashes created above.
var options = {
  captionAndToolbarAutoHideDelay: 0,
  getImageSource: function(obj){
    return obj.url;
  },
  getImageCaption: function(obj){
    return obj.caption;
  }
};

// Create a PhotoSwipe instance.
var instance = Code.PhotoSwipe.attach(images, options);

// Launch the slideshow when the user clicks on the launch link menu item on the home screen.
set_click(launch_link, function(event) { instance.show(0); });
Now, when a user clicks on the first item on our menu (the item itself has an id of launch_link) the photo gallery will be launch. The set_click function was covered in part one of this tutorial.
Android ICS Fix
Based on my tests, Photoswipe is unusable on Android Ice Cream Sandwich version 4.0.0, 4.0.1, and 4.0.2. Things appear to work with Android 4.0.3, but I've only tested this version using the emulator not on an actual device.
On the affected devices the swipe animations are very choppy. Sometimes the images flash when swiped or are not displayed at all. This appears to be a CSS 3D transforms bug in Android 4.0.[0-2].
A quick fix, found here, is to have Photoswipe disable 3D transforms for those specific versions of Android. In order to accomplish this line 326 of Photoswipe's lib/code.util-1.0.6/code.util-1.0.6.js needs to be changed as follows:
// Is this Android ICS versions 4.0.2 or less?
// The this.android variable was defined earlier in the code.
var isAndroidICS = /4.0.[1-2]/.test(this.ua) && this.android;
this.is3dSupported = !Util.isNothing(testEl.style.WebkitPerspective) && !isAndroidICS;
Photoswipe's use of 3D transforms isn't because our photo gallery is in 3D. Using 3D over 2D CSS transforms is a sneaky way to enable hardward-accelerated animations on newer smartphone browsers.
Conclusion
The final working version of our code for part 2 of this tutorial can be tested using your web browser, or by scanning this QR Code.
In this tutorial we developed the swipeable photo gallery portion of our app using the PhotoSwipe library along with images gathered using the Tumblr API. In part three of this tutorial I'll take you through a step-by-step demonstration of turing this (or any other mobile web app) into a native app using Phonegap.
I just released an RSS news reader app built with HTML5 and Phonegap. During the development of the app I encountered the following three problems when loading RSS feeds using the Javascript XMLHttpRequest object:
Certain RSS feeds were being sent out without an XML MIME type, causing Javascript to interpret them as text.
Some servers were detecting the AJAX RSS requests as coming from a mobile browser and redirecting to a mobile friendly HTML page.
When testing outside of PhoneGap I needed a proxy script to fetch the feeds to overcome the browser's cross-domain restrictions.
Overriding Incorrect MIME Types
The XMLHttpRequest object has an overrideMimeType function that can be used to override a requested documents MIME type. Here's an example of a simple AJAX call where the MIME type is being forced to text/xml.
var xhr      = new XMLHttpRequest(),
    feed_url = 'http://some.madeupdomain.ca/feed.xml';

xhr.onerror = function() {
  alert('Error loading the RSS document.');
};

xhr.onload = function() {
  var xml   = xhr.responseXML.documentElement,
      items = xml.getElementsByTagName('item'),
      title = items[0].querySelector('title').firstChild.data;
  alert('The first item title: ' + title);
};

xhr.open('GET', feed_url);
xhr.responseType = 'document';
xhr.overrideMimeType('text/xml');
xhr.send();
Fooling Mobile Browser Redirections
Certain web-servers will perform a blanket mobile-device redirect, no matter what document you are trying to load. I found a few news sites that redirected me to a mobile landing page when I tried to use XMLHttpRequest to load their RSS feed. Most mobile redirects of this nature are triggered by User Agent sniffing, so I needed some way to have my application self-identify as a non-mobile browser.
PhoneGap doesn't allow us to spoof the User-Agent using Javascript. Instead I had to modify the wrapper application. Here are the required modifications to the main .java file for an Android PhoneGap application. I imagine that the WebView of an iOS PhoneGap Objective-C wrapper app could be similarily modified.
package com.yourdomain.feedtest;

import org.apache.cordova.DroidGap;
import android.os.Bundle;
import android.webkit.WebSettings; // Added.

public class FeedTestActivity extends DroidGap {
    @Override
    public void onCreate(Bundle savedInstanceState) {
        super.onCreate(savedInstanceState);
        super.loadUrl("file:///android_asset/www/index.html");
        // Added the following two lines to spoof the user-agent to self-identify as a non-mobile browser.
        WebSettings w = this.appView.getSettings();
        w.setUserAgentString("Mozilla/5.0 (Windows NT 6.1; WOW64) AppleWebKit/535.1 (KHTML, like Gecko) Chrome/14.0.835.202 Safari/535.1");
    }
}
Testing in the Browser Using a Proxy
When I was working on my app I did most of the initial testing using my desktop browser. The only problem is that unlike PhoneGap, browsers do not let you make cross-domain AJAX request. To overcome this I built a simple PHP proxy script that I placed on the same server as my HTML5 mobile app. I then routed all my AJAX calls through this script.
Hi Folks. It's time to build our first native app using web technologies. We are going to build a simple photo gallery app using images from my Meow Reader Tumblr. The code presented should be flexible enough to turn any Tumblr into an app.
A web-based demo of the completed app can be viewed using your desktop or mobile browser, or download the app to your Android phone by following this QR Code. Play around with this demo a bit to get a better idea of what we will be developing.
This tutorial will be split into three parts. In this post we will write the HTML, CSS, and Javascript required to make a web-page look and act like an app. In part two, we will work with the Tumblr API to pull in our photos. In part three, we will use PhoneGap to convert our mobile web app into a native app. We will then deploy to Google Play / the Android Market.
Game Plan
In this post we will be developing the following parts of our app:
The HTML Markup - Our entire app exists within a single HTML5 document.
The CSS Styling - We use CSS to make our page look like an app.
Sub-Page Navigation - A Javascript/DOM menu allows navigation between various sub-pages.
Performance Tuning - We use Javascript to remove the click-event delay introduced by mobile web browsers.
A Word on Frameworks
There are a number of HTML5 frameworks we could have used to build our UI. We will explore some of them in future posts. For this tutorial, however, we will be coding without a framework so that we can get a better understanding of the quirks of mobile web development. I am therefore assuming an intermediate knowledge of HTML5 and CSS3, along with an understanding of Javascript and DOM manipulation. For a quick review of these skills in a mobile context, read my previous post on HTML5 mobile web-app tools.
The HTML Markup
All of the markup for our app will be stored as a single index.html file. We will be using the DOM to allow the user to navigate to various "sub-pages" within our single-page app. The base markup for our app will be:
Hover your mouse over the code to see the longer truncated lines.
The meta elements within the head ensure that our page will be read as mobile friendly markup. The viewport entry disables user-zooming and ensures that we are scaled to fit the actual width of our mobile screen. It also fixes an oritentaion-change bug on iOS devices.
Some developers see disabling the user's ability to zoom as an anti-pattern, but I find that it simplifies things. There are, however, ways to get around the iOS bug without disabling zoom if you are so inclined.
Single Page Navigation
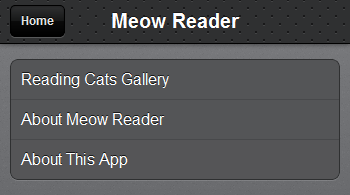
The home "page" of our app will display a top toolbar, along with a naviation menu. I have implemented the menu as an unordered list of links:
<!-- This toolbar will appear at the top of all pages. -->
<div id="toolbar">
  <a href="#home" id="back_button" class="hidden">Home</a>
  <h1>Meow Reader</h1>
</div> <!-- end .toolbar -->

<!-- When our app is loaded this home screen menu will be visible. -->
<div id="home" class="screen">
  <ul class="buttons">
    <li>
        <a href="#" id="launch_link">Reading Cats Gallery</a>
    </li>
    <li>
        <a href="#about_meow" class="switch_screen">About Meow Reader</a>
    </li>
    <li>
        <a href="#about_app" class="switch_screen">About This App</a>
    </li>
  </ul>
</div> <!-- end #home -->
The first link in this list will eventually launch our photo slideshow, but for now it will do nothing. For the remaining two links, we will use Javascript to "link" to seperate sub-pages. Each of these sub-pages will be created as a div element. These divs will be placed below the navigation menu:
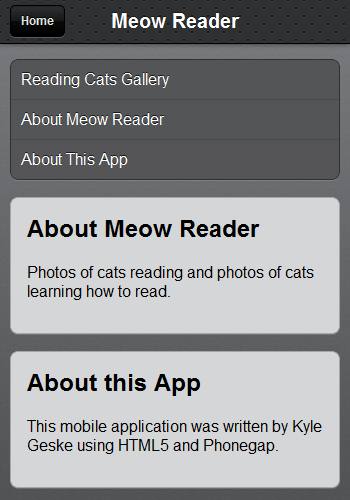
<!-- This sub-page should be loaded by clicking the #about_menu link. -->
<div class="screen hidden" id="about_meow">
  <h2>About Meow Reader</h2>
  <p>Photos of cats reading and photos of cats learning how to read.</p>
</div> <!-- end #about_meow -->

<!-- This sub-page should be loaded by clicking the #about_app link. -->
<div class="screen hidden" id="about_app">
  <h2>About this App</h2>
  <p>This mobile application was written by Kyle Geske using HTML5 and Phonegap.</p>
</div> <!-- end #about_app -->
CSS Styling
For the look and feel of the application we are going to borrow heavily from the JQtouch project. JQtouch is a Zepto/Jquery plugin for mobile web development. I've taken portions of the JQtouch default CSS theme to style our app. Specifically I'm using the JQtouch styles for our navigation menu and the top toolbar.
I placed all my styling rules into a style.css file within a css sub-folder. The full extent of my CSS pilfering can be seen as a github gist. Note that I also added the following CSS to style our "sub-pages":
With the CSS applied, our app is now starting to look like an app. Pretty snazzy, eh?
Javascript "Sub-Page" Navigation
Each "sub-page" in our app, including our home screen navigation menu, is a div with a class of screen. The id attributes of these elements each match an href fragment in our navigation list links. For example, the second navigation link has an href of #about_meow. It will be used to navigate to the div with an id of about_meow. Note that the back button in the toolbar has an href that matches the id of our navigation home screen div.
By default we want to hide the toolbar's back button and the two "about" subpages. If you look back to the HTML, you'll see that these elements have a class of hidden applied to them. We will define this class like so:
.hidden {
    display: none;
}
We are going to use this class along with some Javascript to hide/show DOM elements. Let's build a hide and a show function that use className property of the provided DOM elements to add/remove the hidden class. Using these functions we will create another function called switch_screen that allows us to specify, by id, which sub-page to display. This function will hide all divs with a class of screen and then show the requested div. It will also toggle the visibility of the back button in the toolbar.
// Hide any DOM element by adding the CSS class "hidden",
// unless the class is already present.
function hide(el) {
  if (el.className.indexOf('hidden') === -1) {
    el.className+= ' hidden';
  }
}
// Unhide any DOM element that was previously hidden using
// the CSS class "hidden".
function show(el) {
  el.className = el.className.replace(/ ?hidden/gi, '');
}
// Hide all div.screen elements and then show the div with
// the requested id.
function switch_screen(id) {
  // Remove the hash sign from the start of the id.
  id = id.substring(1);
  var current_screen = document.getElementById(id),
      back_button = document.getElementById('back_button');
  // Find all div.screen elements and hide them.
  [].forEach.call(document.querySelectorAll("div.screen"), function(el) {
    hide(el);
  });
  show(current_screen);
  if (id !== "home") {
    show(back_button);
  } else {
    hide(back_button);
  }
}
We can now bind the bottom two navigation links to this switch_screen function. We will bind the back button to this function as well. We will do this, when the DOM is ready, with a little helper function called set_click. This set_click function takes as arguments an element and a callback function. It overrides the default click action of the element with the supplied callback.
// Helper function the simplify setting click events on elements.
// The callback_fnc provided should be defined with one parameter,
// which will be set to the clicked element when executed.
function set_click(el, callback_fnc) {
  el.addEventListener('click', function(event) {
    // Supress the default click action of links.
    event.preventDefault();
    callback_fnc(el); // Hand off the element in case it's required in our callback.
  }, false);
}
// Execute the provided anonymous function when the DOM is ready.
document.addEventListener("DOMContentLoaded", function() {
  var back_button = document.getElementById('back_button');
  // Set the switch_screen callback for the toolbar back button,
  // passing the link's href value as the argument.
  set_click(back_button, function(e) { switch_screen(e.getAttribute('href')); });
  // Bind each of the buttons on the home screen to a switch_screen callback.
  // Use each link's href value as the switch_screen argument.
  [].forEach.call(document.querySelectorAll("ul.buttons a.switch_screen"), function(el) {
    set_click(el, function(e) { switch_screen(e.getAttribute('href')); });
  });
});
Try navigating to our two sub-pages using the bottom two links in our navigation menu. Use the back button in the toolbar to return to the main menu. Depending on your smartphone you may have noticed a slight delay when navigating our menu. The delay will likely be in the 300 to 400 milisecond range.
Depending on the mobile browser a finger tap will result in the following events being fired:
touchstart
touchend
mousedown
mouseup
click
Mobile browsers typically introduce a 300ms delay after touchend, so that the browser can determine if the user is performing a gesture rather than a click. This might be acceptable while navigating the web, but we want our mobile app to feel snappier. To solve this problem we are going to bind our navigation actions to touchend rather than click. I used a version of Matteo Spinelli's iPhone solution which I modified for Android support.
Links are enhanced using this script as follows:
new NoClickDelay(document.getElementById('id_of_link_element'));
In order to apply this to all my links I modified my set_click function:
function set_click(el, callback_fnc) {
  // Are we on a touch device? i.e. is ontouchstart present?
  if('ontouchstart' in document.documentElement ) {
    new NoClickDelay(el, callback_fnc);
  } else { // For non-mobile browsers.
    el.addEventListener('click', function(event) {
      event.preventDefault();
      callback_fnc(el); // Hand off the element in case it's required in our callback.
    }, false);
  }
}
This fix isn't perfect. I'm still experiences some "ghost click events" that fire after the navigation callback is called. In the future I may use the HTML5 Boilerplate FastButton Solution or the Tappable library.
All of our Javascript files should be placed in a js sub-folder within our project folder.
Conclusion
The final working version of our code for part 1 of this tutorial can be tested using your web browser, or by scanning this QR Code.
In this tutorial we developed a simple single-page navigation system and replicated the default JQtouch mobile app theme. The code we developed should work equally well as a mobile web app on Android and iOS devices. If you have any questions or suggestions for improvements, please leave a comment below.
Hi there. I hear that you want to build native mobile apps using only web technologies. Me too. Before we begin we need to define our required toolset. For the sake of simplicity, I will assume you are already a proficient HTML/CSS/Javascript developer.
Phonegap
"PhoneGap is an HTML5 app platform that allows you to author native applications with web technologies and get access to APIs and app stores. PhoneGap leverages web technologies developers already know best... HTML, [CSS], and JavaScript." -- From the PhoneGap website
PhoneGap allows us to write our applications once and deploy to multiple mobile platforms including Android, iPhone/iPad, Windows Phone 7, Blackberry, WebOS, Symbian, and Bada. It also gives our apps access to native features like the accelerometer, the camera, notifications, and location services to name a few.
Phonegap is free (as in beer and speech) and can be used under Windows, Linux, and Mac OS X.
Download PhoneGap and then follow the Getting Started Tutorial for your intended target device. Alternatively you can use the PhoneGap Build service instead of a local install. It's currently free while in beta, but will eventually be a pay for use service.
HTML5
The markup for our applications will be written in HTML5. If you need a quick HTML5 introduction or review you should head over to Dive into HTML5 by Mark Pilgrim.
The base markup we will be using is a stripped down version of the Mobile HTML5 Boilerplate. In future posts I will explore what those meta elements do, and how the viewport one can be tweaked.
For our CSS we will also be using the Mobile HTML5 Boilerplate as our starting place. For now we will simply grab the "reset" portion of Mobile Boilerplate CSS file. When targeting all phone types we will grab the CSS from the top of that file up until the section labeled "primary styles". If you are not planning on developing for Windows Phones you can safely remove all the sections that mention fixes for IE. Doing that, we are left with this generic mobile CSS reset.
Before we use any fancy CSS3 properties in our app, we will always check the incredible When Can I Use resource to see if the phone we are targeting supports the property we wish to use. For Android development, for example, we will ensure that all the CSS3 we use is supported in Android 2.1 and greater.
Javascript
For our first few apps we will not be using a Javascript framework. We will be writing plain-old Javascript/DOM code. This will keep our code fast and our app size small. If you are a jQuery addict, take a quick look at this jQuery to Vanilla Javascript translation guide.
Just like with our CSS, we will check for platform support of new Javascript features using When Can I Use. A quick visit to this site shows us that for Android development we cannot use the "classList" DOM property shown in the above jQuery to Vanilla Javascript link, unless we are okay with only targeting Android v3+.
There are a number of Javascript frameworks built specifically for mobile development. We will explore a number of these in future blog posts, starting with Zepto (the webkit-optimized jQuery clone) and jQTouch a Zepto plugin for mobile web development.
Emulators
To test your applications you will need a smartphone emulator, especially if you are like me and you don't actually own a smartphone. There are official simulators and/or emulators available for the full suite of mobile web-browsers. However, we want an emulator that includes support for the PhoneGap API. Luckily, a company called tinyHippos (recently acquired by RIM) makes such an emulator. It's called Ripple. Ripple supports PhoneGap built mobile applications, allows you to emulated GPS and Accelerometer events, and includes a web inspector for debugging purposes.
What's Next?
In our next blog post we will use these tools to build our very first mobile app and deploy it to the Android Market.