Html5 Tumblr Mobile App Part Two
Welcome to part two of our tutorial on building a native mobile app using web technologies. We have been building a simple photo gallery app using images from the Tumblr microblogging service. In part one we built the user-interface framework.
Take a moment to play around with the demo from part one. It can be tested using your web browser, or by scanning this QR Code with your smartphone. Be aware that the top menu item isn't implemted yet. The UI we built uses a single HTML document, CSS, and vanilla Javascript to implement a home page with a menu that allows users to navigate to various sub-sections. Our current app has three items in this menu:
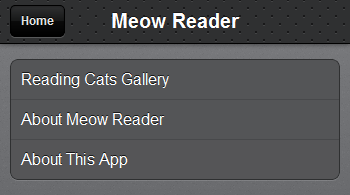
The bottom two menu items were implemented in the previous tutorial. In this post we will be implementing a "touch-swipeable" photo gallery of reading cats. This gallery will be accessible via the first item in our homepage menu.
Game Plan
We're making a basic photo-gallery app. The source of our photos will be my Meow Reader Tumblr. Yes, photos of cats reading and cats learning how to read. Our app isn't going to include the image files, instead it will use Javascript to query the Tumblr API for the URLs and captions of the twenty most recent Meow Reader photos.
In this post we will be developing the following parts of our app:
- Downloading photo data using the Tumblr API.
- Touch-Swipeable Photo Gallery.
In part three of this tutorial we will use PhoneGap/Cordova to convert our mobile web app into a native app.
Fetching our Images
In order for our app to download images for our photo gallery we need three things:
- A source Tumblr. You can use Meow Reader, but feel free to use your favourite Tumblr image blog.
- A Tumblr Account. Sign up here. (This does account does not need to be the owner of the Tumblr you plan on using.)
- A Tumblr OAuth Key, obtained by registering a Tumblr application. Do this now, I'll wait here.
The Tumblr API
Tumblr provides some great documentation for their API, but I'll give you the compressed version. If you want to fetch the most recent photos associated with a specific Tumblr you need to add this script tag to the bottom of your HTML file:
<script
type="text/javascript"
src="http://api.tumblr.com/v2/blog/TUMBLR.tumblr.com/posts/photo?api_key=APIKEY&jsonp=CALLBACK"
></script>
Mouse-over the above code to see it all. I've formatted the attributes strangely for space considerations.
The portions I've shown in all caps need to be filled in as follows:
TUMBLR: Should be the name of the Tumblr you are using. In my case it's meow-reader.
APIKEY: Should be the OAuth Consumer Key listed on your Tumblr application page. (You did create a Tumblr account and you registered an app, right?)
CALLBACK: By including this parameter the data will be returned to us JSONP-style. In other words, this is the name of the Javascript function that you wish to be called after the data is fetched.
Minus my APIKEY, the script tag I've used in this tutorial is:
<script
type="text/javascript"
src="http://api.tumblr.com/v2/blog/meow-reader.tumblr.com/posts/photo?api_key=APIKEY&jsonp=load_images"
></script>
The JSONP Callback and Processing the JSON
The way we've set things up, the Tumblr API will return its data by calling your provided callback function with the requested JSON data as it's argument. Take a moment to look over the Tumblr API JSON structure for photo posts. Here the start of our load_images callback function:
function load_images(json) {
  var i,
      photos,
      photo_big,
      caption_text,
      images = [],
      posts = json['response']['posts'];

  // Gather all 20 images returned from the Tumblr API into an array of hashes.
  for (i = 0; i < posts.length; i++) {
    photos         = posts[i]['photos'][0]['alt_sizes'];
    photo_big      = photos[0]['url'];
    caption_text   = strip(posts[i]['caption']);
    images.push({ url: photo_big, caption: caption_text });
  }
  // Bind these images to our photo gallery here.
}
In this function we loop through all the posts provided in the json['response']['posts'] array, pulling out the URL of the highest-res photo from each post along with the photo caption. We end up with an images array of hashes, where each hash has a url key and a caption key. We're also stripping out all HTML from the photo captions using the following strip function:
// Strip HTML elements from a string.
// IMPORTANT: Only be used with trusted HTML. Very easy to abuse with an XSS attack.
function strip(html) {
  var tmp = document.createElement("div");
  tmp.innerHTML = html;
  return tmp.textContent||tmp.innerText;
}
It's important to only use this function on HTML that you trust. In other words, if you are using somebody elses Tumblr this function could be used as an XSS attack vector.
PhotoSwipe
Now that we have an array of photos to work with, we need to create our mobile-friend image gallery. For this we will be using the Photoswipe library. PhotoSwipe is a free HTML/CSS/JavaScript based image gallery specifically targeting mobile devices. It uses the latest CSS3 transistions and Javascript touch-events to implement a slick touch-swipe photo gallery.
Download the latest Photoswipe zip file. At the time of this blog post, the latest version was 3.0.4. Extract the klass.min.js and code.photoswipe-3.0.4.min.js to your js sub-folder. Extract the error.gif, icons.png, [email protected], loader.gif and photoswipe.css files to your css folder. Import the require Javascript and CSS:
<!-- The css link element should be placed in the head of your index.html file. -->
<link href="css/photoswipe.css" type="text/css" rel="stylesheet" />
<!-- These script elements should be placed at the bottom of your html file before the closing body tag. -->
<script type="text/javascript" src="js/klass.min.js"></script>
<script type="text/javascript" src="js/code.photoswipe-3.0.4.min.js"></script>
By default, Photoswipe expects your HTML to contain a collection of image thumbnails that link to full sized images. However, they're also provide an example of using Photoswipe with an array of hashes that contain image URLs and captions. Since we've already built an array like this, we need only add the following code to the bottom of our load_images function to create our photo gallery:
// Fetch a DOM reference to the first element in our homepage menu.
var launch_link = document.getElementById('launch_link');

// Configure Photoswipe to load images from the array of hashes created above.
var options = {
  captionAndToolbarAutoHideDelay: 0,
  getImageSource: function(obj){
    return obj.url;
  },
  getImageCaption: function(obj){
    return obj.caption;
  }
};

// Create a PhotoSwipe instance.
var instance = Code.PhotoSwipe.attach(images, options);

// Launch the slideshow when the user clicks on the launch link menu item on the home screen.
set_click(launch_link, function(event) { instance.show(0); });
Now, when a user clicks on the first item on our menu (the item itself has an id of launch_link) the photo gallery will be launch. The set_click function was covered in part one of this tutorial.
Android ICS Fix
Based on my tests, Photoswipe is unusable on Android Ice Cream Sandwich version 4.0.0, 4.0.1, and 4.0.2. Things appear to work with Android 4.0.3, but I've only tested this version using the emulator not on an actual device.
On the affected devices the swipe animations are very choppy. Sometimes the images flash when swiped or are not displayed at all. This appears to be a CSS 3D transforms bug in Android 4.0.[0-2].
A quick fix, found here, is to have Photoswipe disable 3D transforms for those specific versions of Android. In order to accomplish this line 326 of Photoswipe's lib/code.util-1.0.6/code.util-1.0.6.js needs to be changed as follows:
// Is this Android ICS versions 4.0.2 or less?
// The this.android variable was defined earlier in the code.
var isAndroidICS = /4.0.[1-2]/.test(this.ua) && this.android;
this.is3dSupported = !Util.isNothing(testEl.style.WebkitPerspective) && !isAndroidICS;
I've provided a single file minified version of PhotoSwipe 3.0.4 with this fix in place.
Photoswipe's use of 3D transforms isn't because our photo gallery is in 3D. Using 3D over 2D CSS transforms is a sneaky way to enable hardward-accelerated animations on newer smartphone browsers.
Conclusion
The final working version of our code for part 2 of this tutorial can be tested using your web browser, or by scanning this QR Code.
In this tutorial we developed the swipeable photo gallery portion of our app using the PhotoSwipe library along with images gathered using the Tumblr API. In part three of this tutorial I'll take you through a step-by-step demonstration of turing this (or any other mobile web app) into a native app using Phonegap.
This final Phonegap-wrapped version of this app is already available for download on the Android app store.